Halfpipe Plans
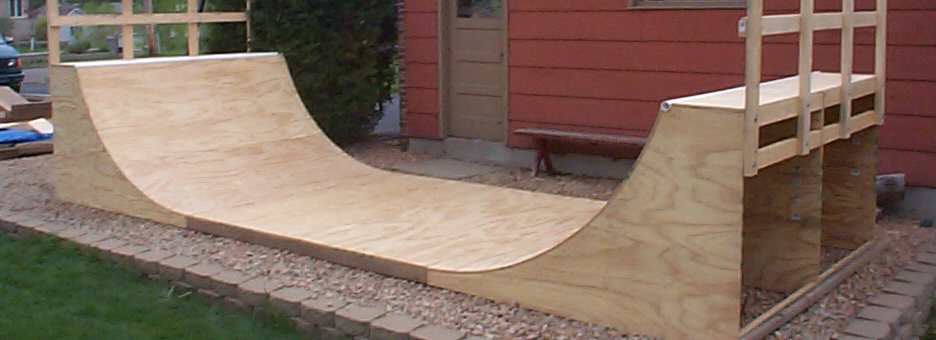
FREE HALFPIPE PLANS! I built the halfpipe in the Spring of 2001 for about $450. It is very hard to estimate the cost of the pipe these days. The best way is to take the materials list, which is in the set of plans, to your local home improvement or lumber store and price it out. It took me about 4-5 days spending maybe 4-5 hours each day to complete it. Really. The price includes the paint which is not included in the materials list. I will be glad to answer any questions you have, send me an e-mail.
FREE DOWNLOAD 248k pdf file of the 12 page free halfpipe plans.
FREE DOWNLOAD 6ft Curve addendum to the skateboard version!
ADDENDUM TO MATERIALS LIST: You will need a total 61 2x4s for the inline version and 59 for the Skateboard version.
READ THE REST OF THIS! IT ANSWERS MANY OF THE QUESTIONS YOU HAVE!
My free plans are for a beginners halfpipe and were designed to take the best advantage of the dimensions of 4’x8’ plywood and 2”x4”x8’ studs and have little waste. In my research I was told that inline skaters like a little steeper slope than skateboarders so I designed the plans to have two versions. You really can skate anything you want or like. I just call mine inline version and skateboard version only because they tend to fit the needs of one over the other. The height of each just came out as they are in order to fit two curved ends on each sheet of plywood.
AMERICAN MEASUREMENTS: Skateboard version is 24’L x 8’W x 3’3”H and has a platform a little over 2’ deep. The other is for inline skating, this one has a steeper slope and is a little higher. 21’L x 8’W x 4’H with a platform about 1’ 4” deep. The flat bottom is 8’x8’.
EVERYONE ELSE (METRIC) MEASUREMENTS (approx): Skateboard version is 7.312m L x 2.438m W x 1m H and has a platform a little over .609m deep. It has a 2.286m radius transition curve. The other is for inline skating, this one has a steeper slope and is a little higher. 6.4m L x 2.438m W x 1.219m H with a platform about .396m deep. It has a 1.714m radius transition curve. The flat bottom in the middle is 2.438m x 2.438m. These measurements may not be exactly what yours will be. The conversion was based on the dimensions of lumber in America. Your lumber may be slightly different.
If you skateboard I would use a steel pipe for the coping rather than a plastic one. It will hold up to skateboards better and it is a little slower than plastic. The plastic seems a little too fast at times for skaters when they are trying to set themselves up for some grinds.
Put a 4 – 6 mil sheet of plastic under the halfpipe to act as a vapor barrier. It will prevent moisture from condensing under the halfpipe.
Moms and Dads, don’t think this replaces skate parks or street skating because it won’t. It adds to them. It is a good thing to have for practicing and for beginners to start out on. Believe me, they will love you for it.
Just to let you know the global reach of these plans I have had questions and requests from all over the US, Canada, Hawaii, England (UK), New Zealand, Australia, Northern Ireland, Scotland, Israel, South America, South Africa, Sweden, Estonia, Latvia, Bulgaria, Belgium, United Arab Emirates, Hong Kong, Switzerland, Romania, Russia, Barbados and China! Happy Skating! and Wear Your Helmet!